Getting started
By following these steps, you can set up DataForge, ensuring proper user management, Zabbix integration, and customization based on your specific requirements.
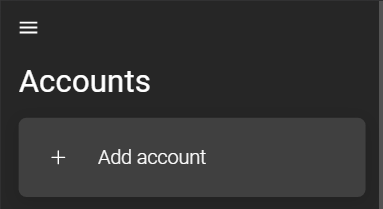
1. Add an account
To log into DataForge, you need to add an account:
The differences between the IntelliTrend Mobile for Zabbix app and the web service are described in the chapter Account.
Here you need to choose whether you are logging in as a DataForge User or an DataForge Manager. A DataForge Manager is a user, which does not originate from a Zabbix server and is created within DataForge. A manager is used for administrative tasks such as creating companies, adding Zabbix servers to DataForge, manage and create roles, media types and DataForge users.
Choose DataForge Manager:

The login form for a DataForge manager requires the address of your DataForge server and your user credentials. Fill out the following form:
If DataForge is bought as SaaS, username and password will be provided to you. If DataForge is bought as On-Prem, you can find the default login credentials in step 2. Create a DataForge manager.

- DataForge Server: The URL of the DataForge server without
https://orhttp://. The URL prefix will be selected via the dropdown. - Username: Your designated username.
- Password: Your designated password.
- API guard token: If provided, this adds an extra layer of security.
- Save Password: A checkbox that, when enabled, saves the password for future use.
2. Create a DataForge manager
If DataForge was bought as SaaS, skip to 3. Create a root user.
To create a new DataForge Manager, you have to log in with the default DataForge Manager. The credentials are the following:
- Username: admin@dataforge.loc
- Password: dataforge
Detailed information about DataForge managers and how to create them can be found here.
For optimal access and control over DataForge, it is highly recommended to grant the newly created DataForge Manager the Superadmin role. This role provides comprehensive accessibility to all features and functionalities within DataForge. Once a new DataForge Manager with the superadmin role has been created, disable the default DataForge manager. By disabling the default DataForge Manager, you ensure that only the newly created DataForge Manager has active access to DataForge. This is a good security practice to prevent unauthorized access using default credentials.
3. Create a root user
The root user is a Zabbix user that DataForge employs to execute administrative tasks on the Zabbix server. This user has to be specified while adding a Zabbix server. The administrative actions include tasks such as creating a service user in Zabbix via the DataForge user group wizard or managing maintenances. This root user has to be created on your Zabbix server or can be an existing Zabbix user.
More infos about creating a root user can be found in the chapter Zabbix Root User.
4. Add a Zabbix server
Adding a Zabbix server effectively enables DataForge to access the data the Zabbix server monitors.
How to add a Zabbix server to DataForge is described in chapter Zabbix server integration.
5. Create a company
This step is optional.
Companies serve as a virtual representation of a business, department or any other organizational unit within DataForge.
To create a company you have to be member of a reseller company.
The chapter Companies provides details about companies and how to create them.
6. Create custom user roles
This step is optional.
The authorization system in DataForge is structured around user roles. DataForge offers default and customizable user roles based on ACL rules.
More details about user roles can be found in the chapter User Roles.
7. Define role matching rules
This step is optional.
Role matching is a feature that can manage the roles of imported users automatically. It is enabled by default.
More information can be found in the chapter Role Matching.
8. Import Zabbix user
A Zabbix user that is imported into DataForge is called a DataForge User. These DataForge users can access and work with all features of DataForge as long as they have the necessary user role. These features are described in the user manual.
How to import a Zabbix user into DataForge is described in chapter Import Zabbix users.
9. Assign user groups
A DataForge user group is one of the requirements for accessing the reporting section and can be assigned with the help of the user group wizard. Members of a DataForge user group operate through a service user. The service user’s Zabbix permissions dictate which data from a Zabbix server can be accessed by group members.
The chapter User group wizard describes how to assign user groups.
10. Create a media type
Media types are used to specify the delivery method for reports. These media types are unique to each company and are built upon three primary base types: Email, SCP, and Kafka.
More information about media types can be found in chapter Media types.