User roles
DataForge provides default user roles with predefined ACL rules, which are available for all companies and cannot be modified or removed. Additionally, users have the possibility to create custom user roles. Custom roles are associated with companies and are only accessible within the company they were created in. Their parent companies can view, but not utilize them.
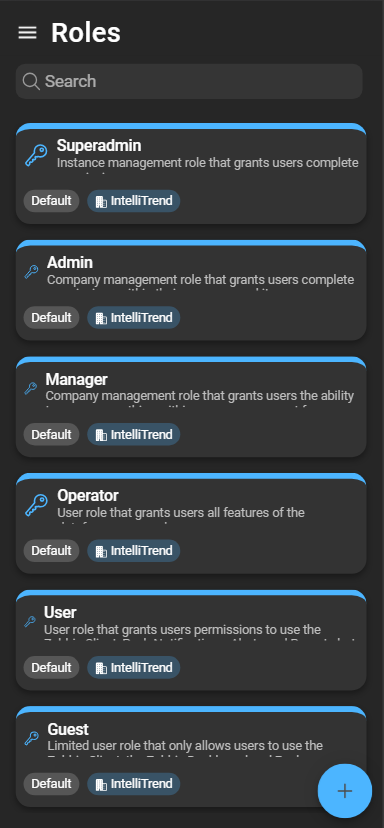
Navigate to Administration > Roles to access the list of user roles. Here you can review the default roles, create new roles, and make necessary edits.
Inspecting a role
Depending on the type of user role, accessing a user role may vary.
- To inspect a default user role, click the eye icon.
- For custom roles, click the configuration button. This allows you to inspect or edit the role.
Create a new role
To create a new role, click the blue plus:
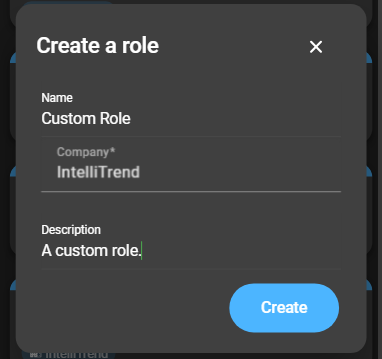
- Name: The name of the user role.
- Company: Select a company, where the role will be available.
- Description: Set a description for the user role.
After filling out the form, click Create to complete the process.
Configure a role
To access the configuration, click the configuration button of the role.
Basic settings
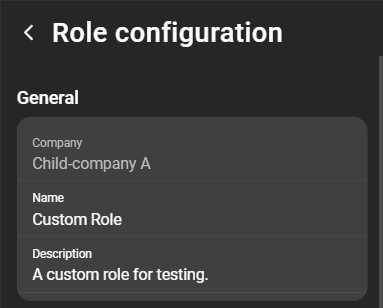
At the top of the configuration page the associated company is listed. Right beneath that, the name and description can be changed.
General permissions
The general permission section provides a way to allocate permissions using switches. Enabling a permission category through the switch will always override the settings of specific permissions, offering a more generalized approach.
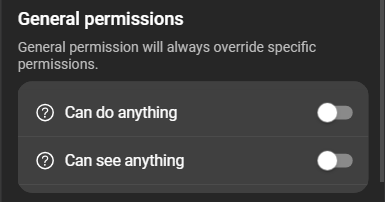
- Can do anything: Provides no specific permissions, instead a permission check is always successful if an authorization is checked.
- Can see anything: Allows the user to view everything by granting the
readpermission for all items.
Specific permissions
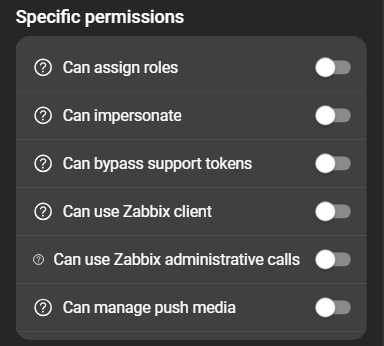
- Can assign roles: Enables the user to create and assign roles to other users.
- Can impersonate: Grants the user permission to impersonate other users.
- Can bypass Support Tokens: Gives the user the ability to bypass the requirement for a support token* when impersonating other users.
- Can use Zabbix Client: Provides access to the Zabbix client section.
- Can use Zabbix administrative Calls: Grants the user the ability to perform administrative actions on the Zabbix server using the root user.
- Can manage push media: A permission related to the push notification service of our IntelliTrend Mobile for Zabbix. It allows the user to use the in-app solution for configuring the necessary Zabbix user media.
Support tokens are necessary for impersonating DataForge Users from other companies and are always required when impersonating other DataForge Managers.
The specific permission section is divided in to three categories: Administration, Reporting and Self Provisioning. Each category can be configured as needed (Reporting as example):
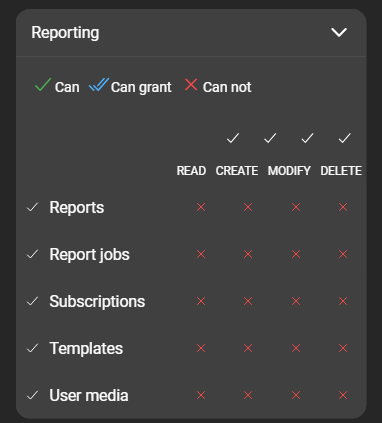
The three categories are corresponding to a specific functionality within the DataForge. A permission is divided into: Create, Delete, Modify, and Read. Each of these permissions can have one of three states:
- Can Not: If a rule is set to
Can Not, the role is prohibited from performing the corresponding action. - Can: When a rule is set to
Can, the role is allowed to perform the corresponding action. - Can Grant: When a rule is set to
Can Grant, the role can perform the corresponding action and can also grant other roles the permission to use that action.
To grant permissions to other roles, a role must have the necessary permissions to create or modify roles.
Role overrides
A user can be a member of multiple user groups. With role overrides, the user can have changing user roles depending on the user group the user acts for.
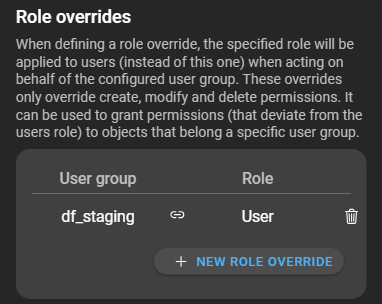
If a user is for example part of the “dfu_group:master@intellitrend.de” and acts on behalf of that group, the user’s base role will be overridden with the admin role. The override only impacts the create, delete, and modify permissions, but not the read permissions. These read permissions need to be configured in the base role, even if the role is going to be overridden.
To configure role mapping, click the New Role Override button:
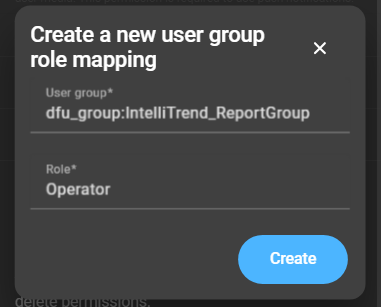
The user group acts as an identifier. If an imported user is a member of that user group, the user’s permissions will be overridden by the assigned role (located in the second input field, Role).
Delete a custom role
To delete a custom role, open the context menu button and click Delete.