Role matching
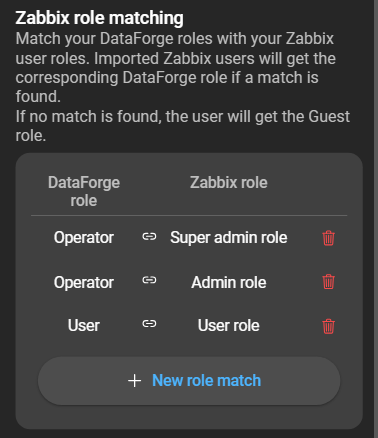
DataForge is utilizing the pre-existing Zabbix user roles when importing users. The name of this user role acts as an identifier to determine if there is a corresponding role within DataForge’s system. While the role names in Zabbix and DataForge may be the same, their permission sets are not necessarily identical.
Role matching in DataForge can result in one of three potential outcomes, these are:
- If a Zabbix role is matched with a DataForge role, the DataForge role will be assigned to the user.
- If a Zabbix role has an exact string match in DataForge, the corresponding DataForge role will be assigned to the user.
- If none of the above apply, the user will default to the
guestrole in DataForge. This role has minimal permissions.
To view or edit your role matching rules navigate to Administration > Zabbix servers. Then access the Zabbix servers settings and navigate to Zabbix role matching. Here you can add or edit your role matching rules. These role matching rules will only apply to the selected server.

Add a role match
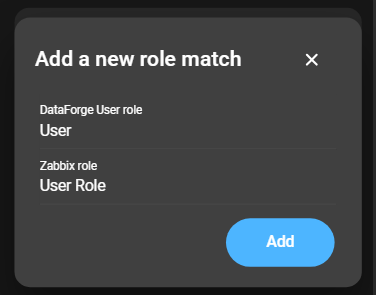
To create a new role matching rule, click on the New role match button. This will open a form with two fields:

- DataForge Role: Select from the list of user roles created within DataForge.
- Zabbix Role: Select a role that exists on the Zabbix server.
Change the role of an imported Zabbix user
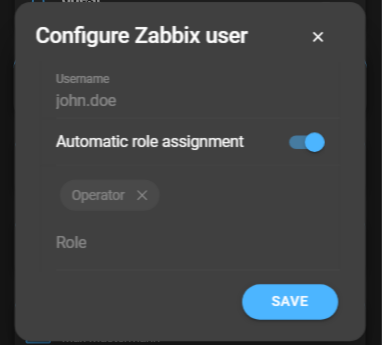
By default, the role is automatically assigned. If role matching is disabled after the user is imported, you can manually assign a role to the user.
To disable the automatic role assignment, navigate to Imported Zabbix users and click on configuration button of the user. This will open the Zabbix user configuration:

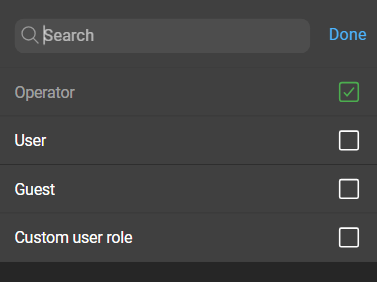
Disabling the Automatic Role Assignment will make the role selection available. In the selection, you will find a list of all default and created roles.
